
12 Easy Air Dry Clay Christmas Decorations to Make at Home
There's something rather lovely about handmade Christmas decorations, isn't there?
They don't have to be perfectly shaped, beautifully painted or look as though they've come straight from an expensive homeware shop.
Sometimes it's the slightly wonky stars, the little fingerprints and the decorations made around the kitchen table that become the ones we treasure most.
With Christmas approaching, I've been looking at different crafts I'd love to try, and air dry clay keeps catching my attention.
I've already written about air dry clay ideas for adults, particularly as a creative hobby that might be adapted around limited energy.
What appeals to me is the idea of making something decorative without needing a kiln or specialist pottery equipment.
And Christmas seems like a lovely excuse to give it a go.
From personalised tree ornaments to little festive houses and handmade gift tags, there are plenty of air dry clay Christmas decorations that beginners can explore.
Here are 12 ideas worth trying, along with practical tips for getting started.
What Do You Need to Make Air Dry Clay Christmas Decorations?
One of the appealing things about air dry clay is that you don't need a huge collection of specialist equipment to begin.
For many simple projects, you'll need:
Air dry clay suitable for craft projects
A rolling pin or smooth cylindrical object
Christmas shaped biscuit cutters
A smooth, clean work surface
A small tool or drinking straw for making hanging holes
Acrylic paints and paintbrushes
Ribbon, string or twine
A little water for smoothing the clay, if recommended by the manufacturer
Fine sandpaper suitable for craft use, if needed
A suitable decorative sealant, if recommended for your clay
You might also want some textured materials such as lace, leaves or stamps to create patterns.
Always follow the clay manufacturer's instructions, particularly for drying times, painting and sealing.
Craft tools and clay should be kept away from young children unless they're being used with appropriate supervision.
1. Simple Air Dry Clay Christmas Stars
Stars are one of the easiest Christmas decorations to begin with.
Roll out your clay to an even thickness, then use a star shaped cutter to create your decorations.
Make a small hole near the top of each star before the clay dries so you can thread ribbon through later.
Once completely dry, you can leave the stars in their natural colour or paint them white, gold, silver or another festive shade.
For a more rustic appearance, try pressing a piece of lace or textured fabric gently into the surface before cutting out the shapes.
A collection of handmade stars could look lovely hanging from a Christmas tree or displayed along a festive branch.
2. Personalised Christmas Tree Decorations
Personalised ornaments are a lovely idea for family keepsakes.
You could make simple circles, hearts, stars or Christmas tree shapes and add names, initials or the year.
Letter stamps can be pressed gently into the clay while it's still soft.
Alternatively, you could wait until the decorations have dried and add lettering with suitable paint pens.
These would make thoughtful additions to a family Christmas tree, particularly if you make a new decoration each year.
They could also become little gifts for grandparents, relatives or friends.
3. Air Dry Clay Gingerbread Decorations
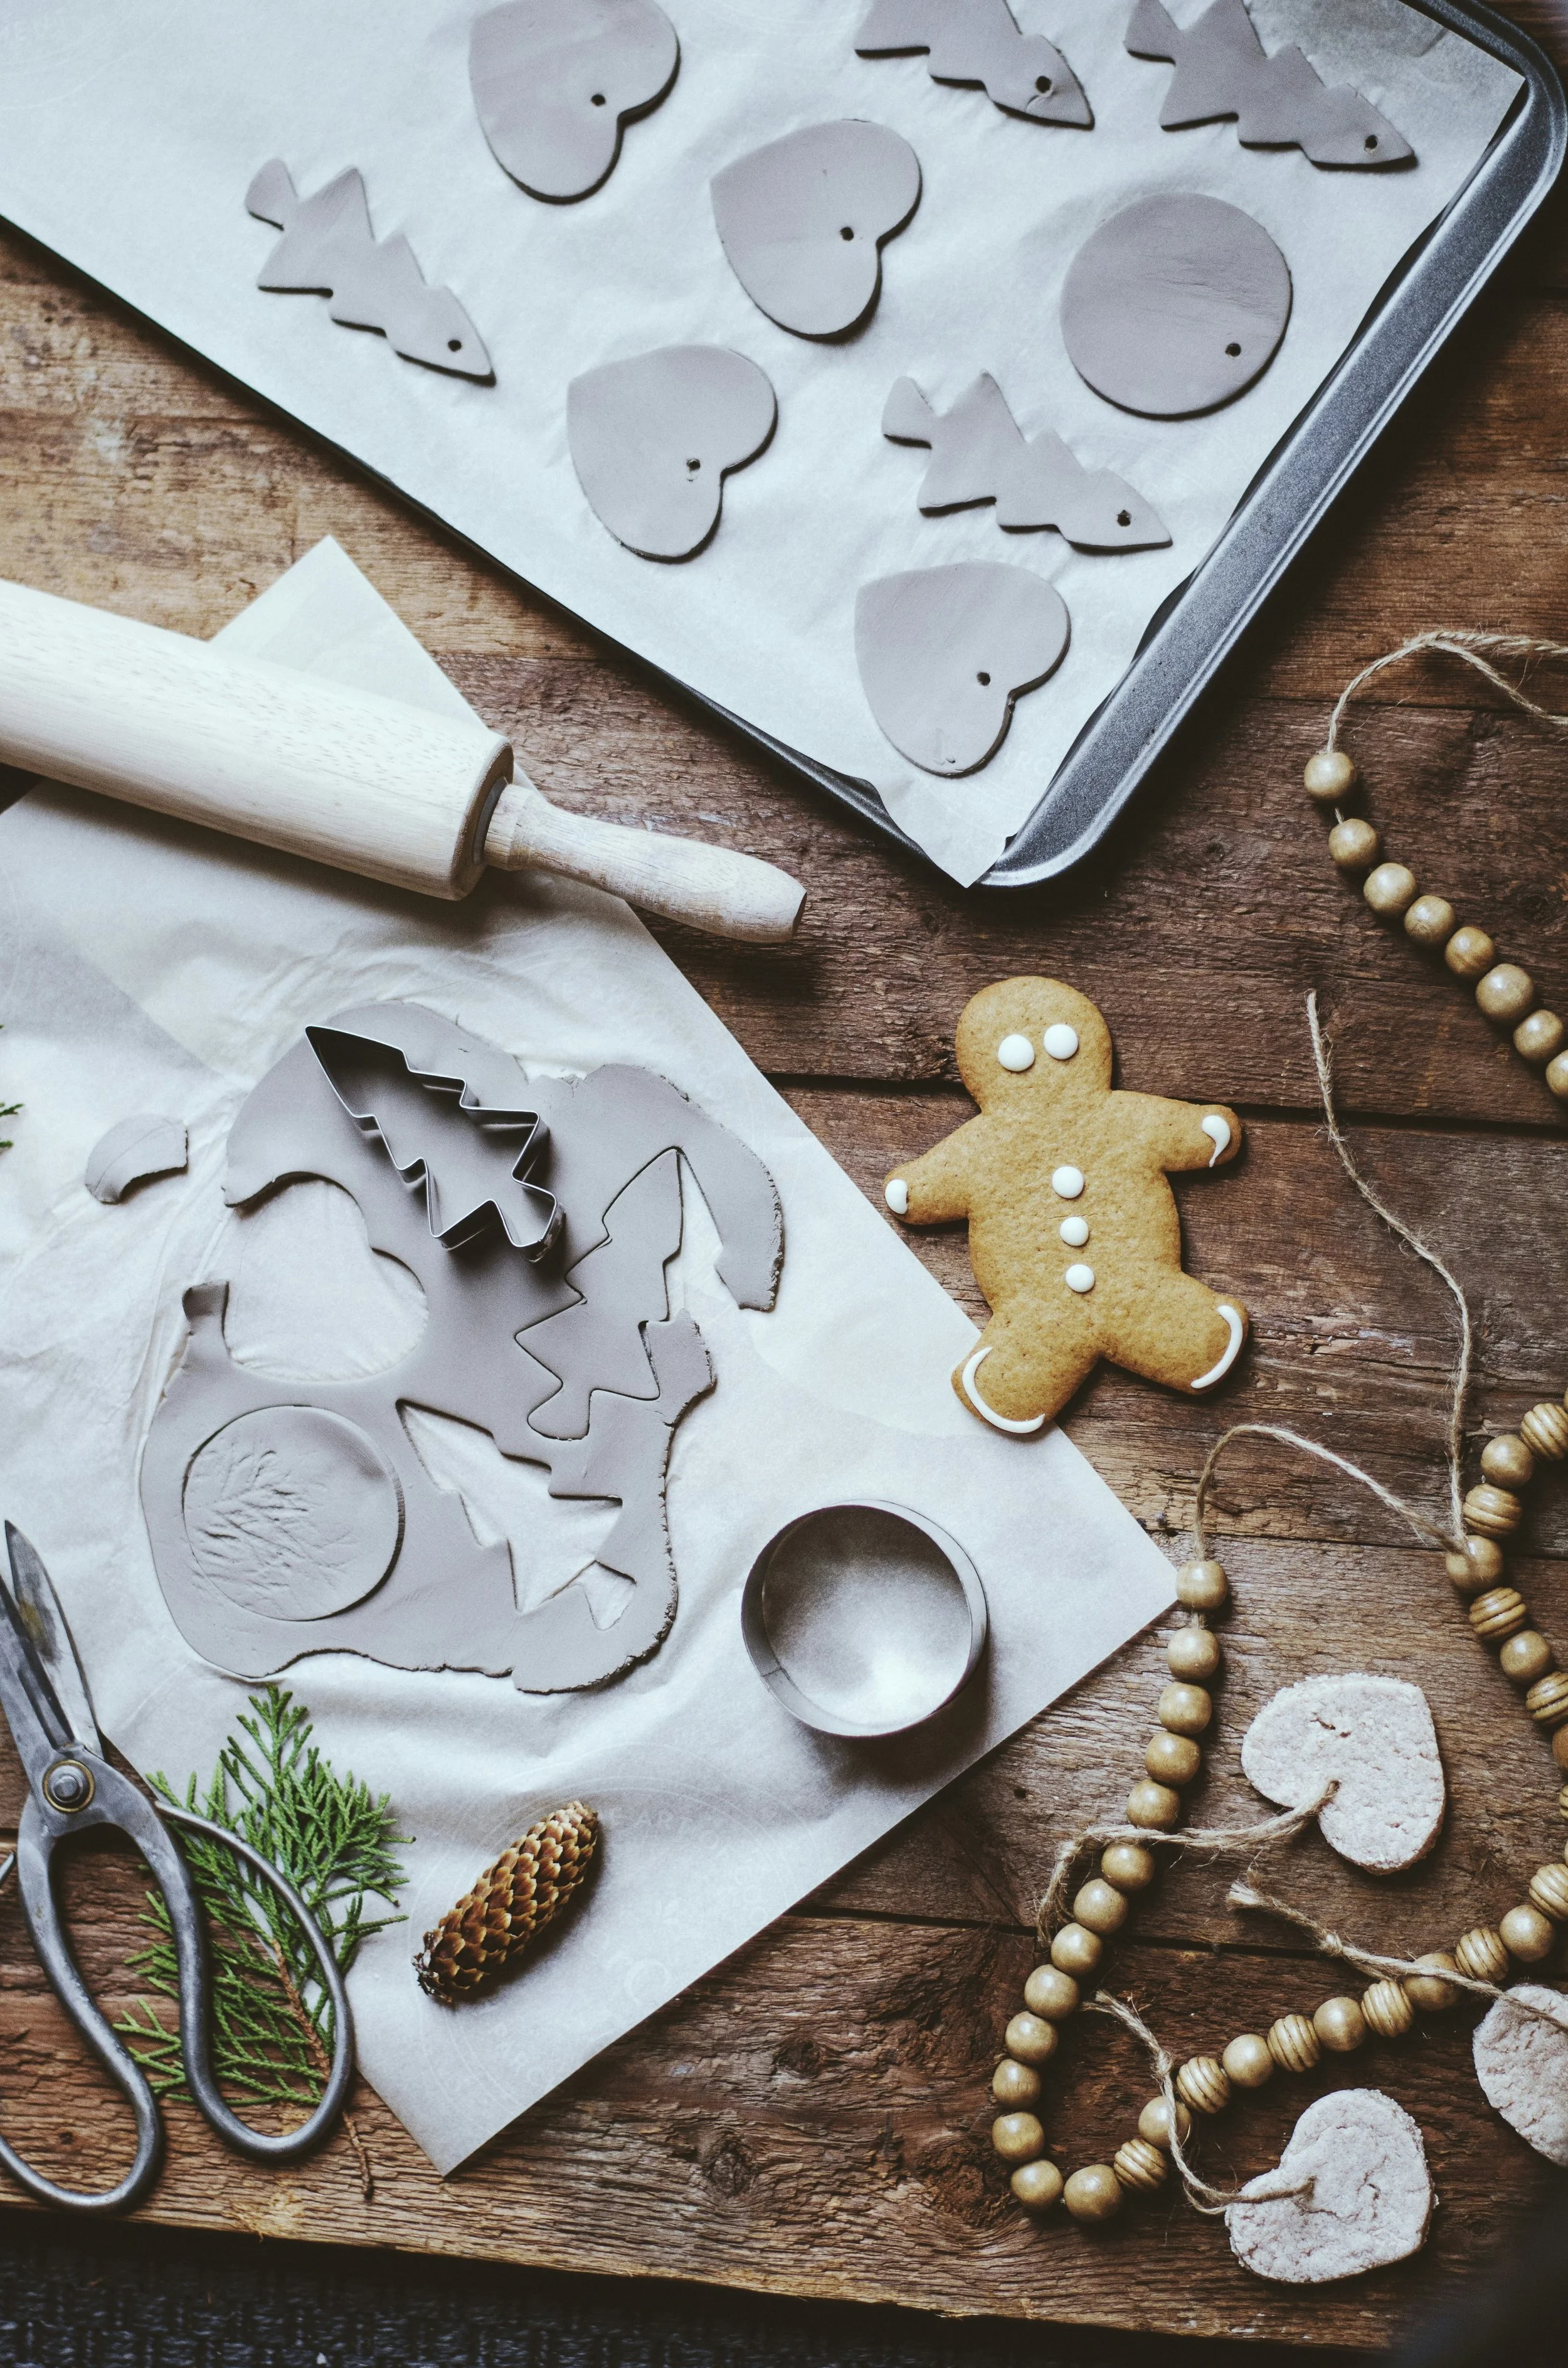
Photo by Melanie Lepine on Unsplash
Gingerbread shapes aren't just for baking!
Using a gingerbread person cutter, you can create festive decorations that resemble traditional Christmas biscuits.
Once the clay has dried, paint the shapes in warm brown tones and add white decorative details to imitate icing.
You could create buttons, little faces or simple patterns.
For something slightly different, leave the clay unpainted and add a small ribbon bow.
These decorations would be particularly charming on a traditional Christmas tree with red ribbons, wooden ornaments and warm fairy lights.
Just remember that air dry clay decorations aren't edible, so they should be kept away from young children or pets who might mistake them for food.
4. Botanical Christmas Ornaments
If you prefer natural Christmas decorations, botanical clay ornaments could be a lovely choice.
Before cutting your shapes, gently press small leaves, sprigs of greenery or textured plant materials into the clay.
Remove them carefully to reveal the impressions.
You could use circular cutters, stars or simple rectangular shapes.
Once dry, leave the ornaments in their natural colour or highlight the patterns with a little paint.
These would suit a woodland inspired Christmas theme, particularly alongside wooden decorations, pine cones and natural ribbons.
Avoid using unknown or irritating plants, and wash your hands after handling plant materials.
5. Miniature Air Dry Clay Christmas Trees
Little clay Christmas trees could make attractive decorations for shelves, windowsills or festive displays.
For a flat version, roll out the clay and use a Christmas tree shaped cutter.
You can then decorate the trees with painted dots, lines or simple patterns.
For a freestanding version, try shaping a small cone and adding gentle textured details.
Keep freestanding pieces modest in size and follow the clay manufacturer's guidance about thickness and drying, as thick sections may dry unevenly or crack.
A small group of trees in different sizes could create a simple Christmas display.
6. Handmade Clay Christmas Gift Tags
I love the idea of making something that becomes part of the present itself.
Instead of using traditional paper gift tags, you could create small air dry clay tags to attach to Christmas gifts.
Roll the clay thinly and cut out rectangles, circles or hearts.
Make a hole for the ribbon and add the recipient's name or initials.
Once dry, thread the tag onto the gift ribbon.
The recipient can then keep it as a decoration rather than throwing it away with the wrapping paper.
This could be a lovely way to make simple Christmas presents feel a little more personal.
7. Air Dry Clay Snowflake Decorations
Snowflakes are another beginner friendly Christmas craft.
You can use snowflake shaped cutters or create simple circular ornaments with snowflake patterns pressed into the surface.
Once dry, paint them white or add a little silver detailing.
For a subtle look, leave the natural clay visible and highlight only the raised or recessed patterns.
A collection of snowflakes hanging from white ribbon could look particularly pretty against the darker branches of a Christmas tree.
If you're making delicate shapes, handle them carefully because thin clay sections may be fragile.
8. Miniature Christmas Houses
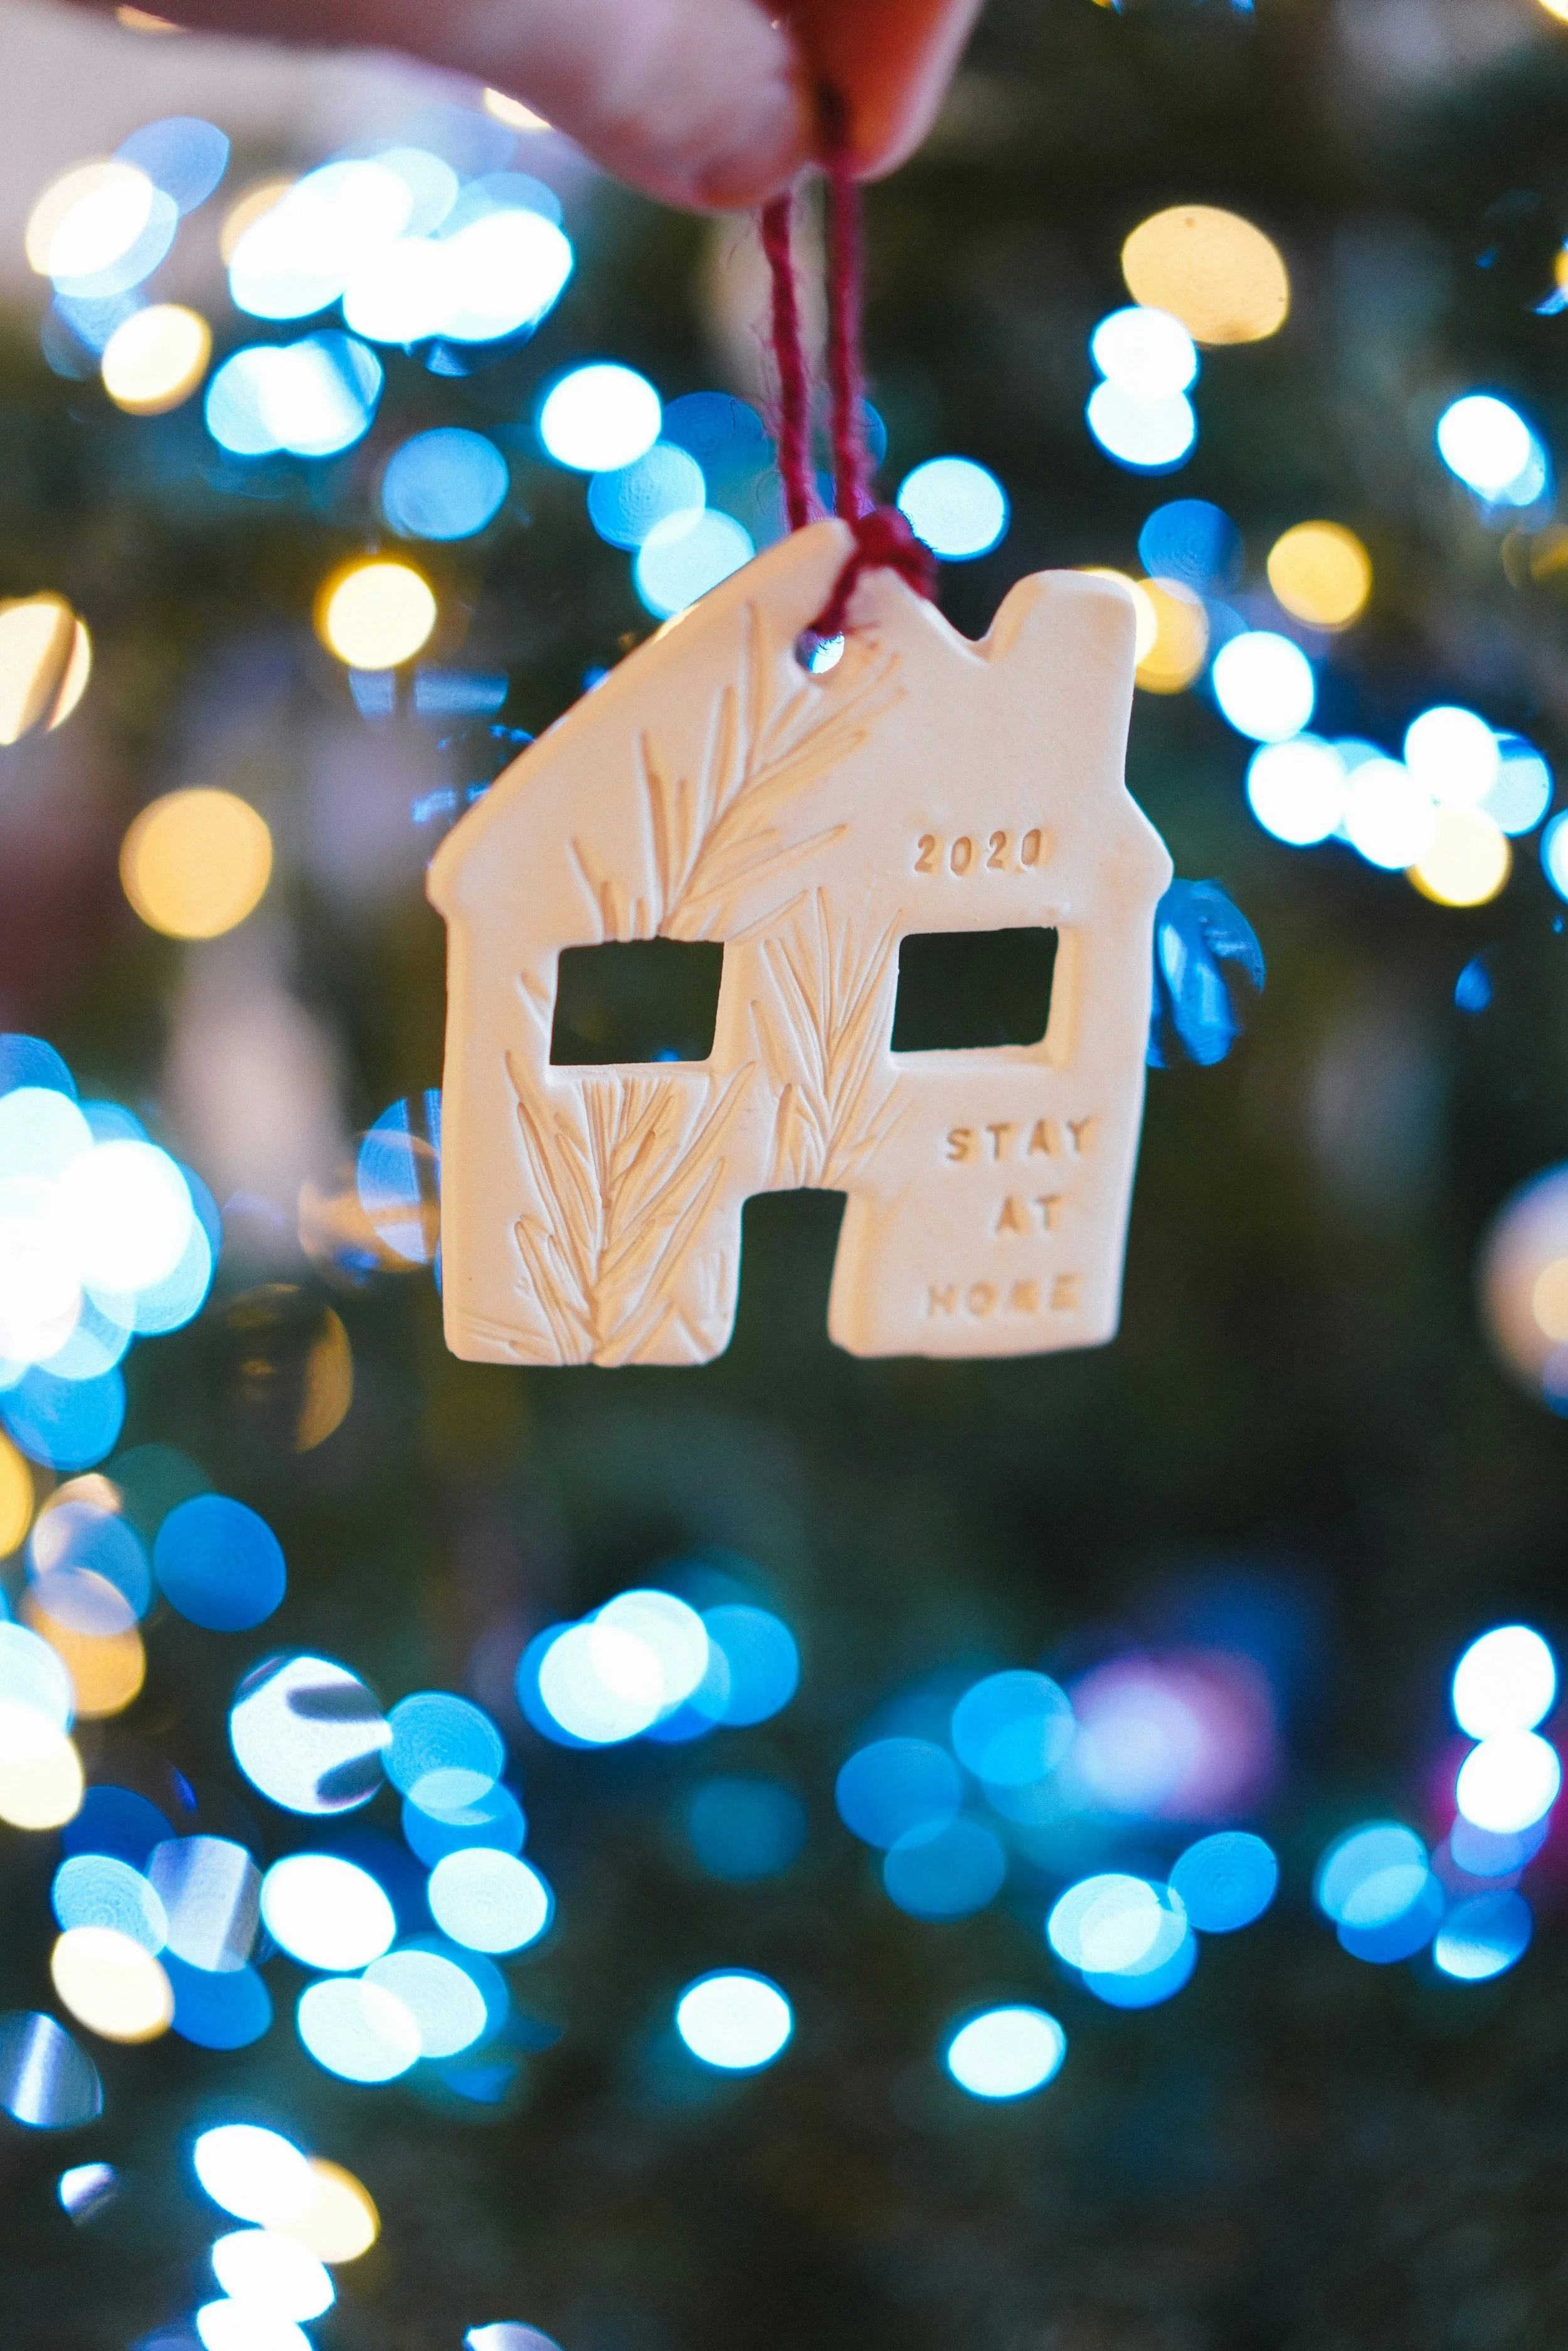
Photo by Phil Hearing on Unsplash
Little Christmas houses are a charming idea for festive displays.
For a beginner project, I'd start with flat house shaped decorations rather than attempting a complicated three dimensional structure.
Cut simple house silhouettes from rolled clay, then add windows, doors and roof details using suitable modelling tools.
Once dry, paint them in neutral colours or traditional festive shades.
You could make a collection of different houses and display them together on a shelf.
If you want hanging decorations, remember to add a hole before the clay dries.
For more complicated structures, follow a suitable craft tutorial and allow plenty of drying time before joining or decorating the pieces.
9. Air Dry Clay Christmas Garland
A handmade clay garland could be a lovely alternative to traditional Christmas bunting.
Create several small shapes, such as stars, hearts or Christmas trees.
Make a hole in each one before drying.
Once the decorations are completely dry, thread them onto strong string or ribbon, leaving a little space between each shape.
You could hang the garland across a shelf, along a mantelpiece or somewhere else suitable.
Because clay decorations can be heavier and more fragile than paper bunting, make sure the garland is securely supported and kept away from places where it could be pulled down.
Avoid placing decorations close to candles, open flames or other heat sources.
10. Clay Christmas Present Toppers
Small clay decorations can also be used to decorate wrapped presents.
A simple star, heart or miniature Christmas tree tied onto a parcel can make even plain brown wrapping paper look festive.
You could choose one colour theme for all your Christmas gifts or personalise each topper with initials.
After Christmas, the decorations can be removed from the wrapping and kept for future use.
This is a particularly appealing idea if you enjoy thoughtful gift wrapping but don't want to spend a fortune on decorative accessories.
11. Air Dry Clay Festive Trinket Dishes
Not every Christmas craft needs to hang on the tree.
A small festive trinket dish could be a lovely handmade gift or decorative addition to a bedroom.
You could create a shallow dish using a suitable small bowl as a mould, following the clay manufacturer's guidance.
Once dry, paint a simple Christmas design inside.
Stars, snowflakes, holly inspired patterns or festive colours could all work well.
These dishes are best used for dry decorative items such as rings or small keepsakes.
Ordinary craft air dry clay shouldn't be assumed to be waterproof or food safe, even after sealing.
Avoid using the finished dish for food, drinks or wet items unless the manufacturer specifically confirms that the material and finish are suitable.
12. Handmade Christmas Keepsake Decorations
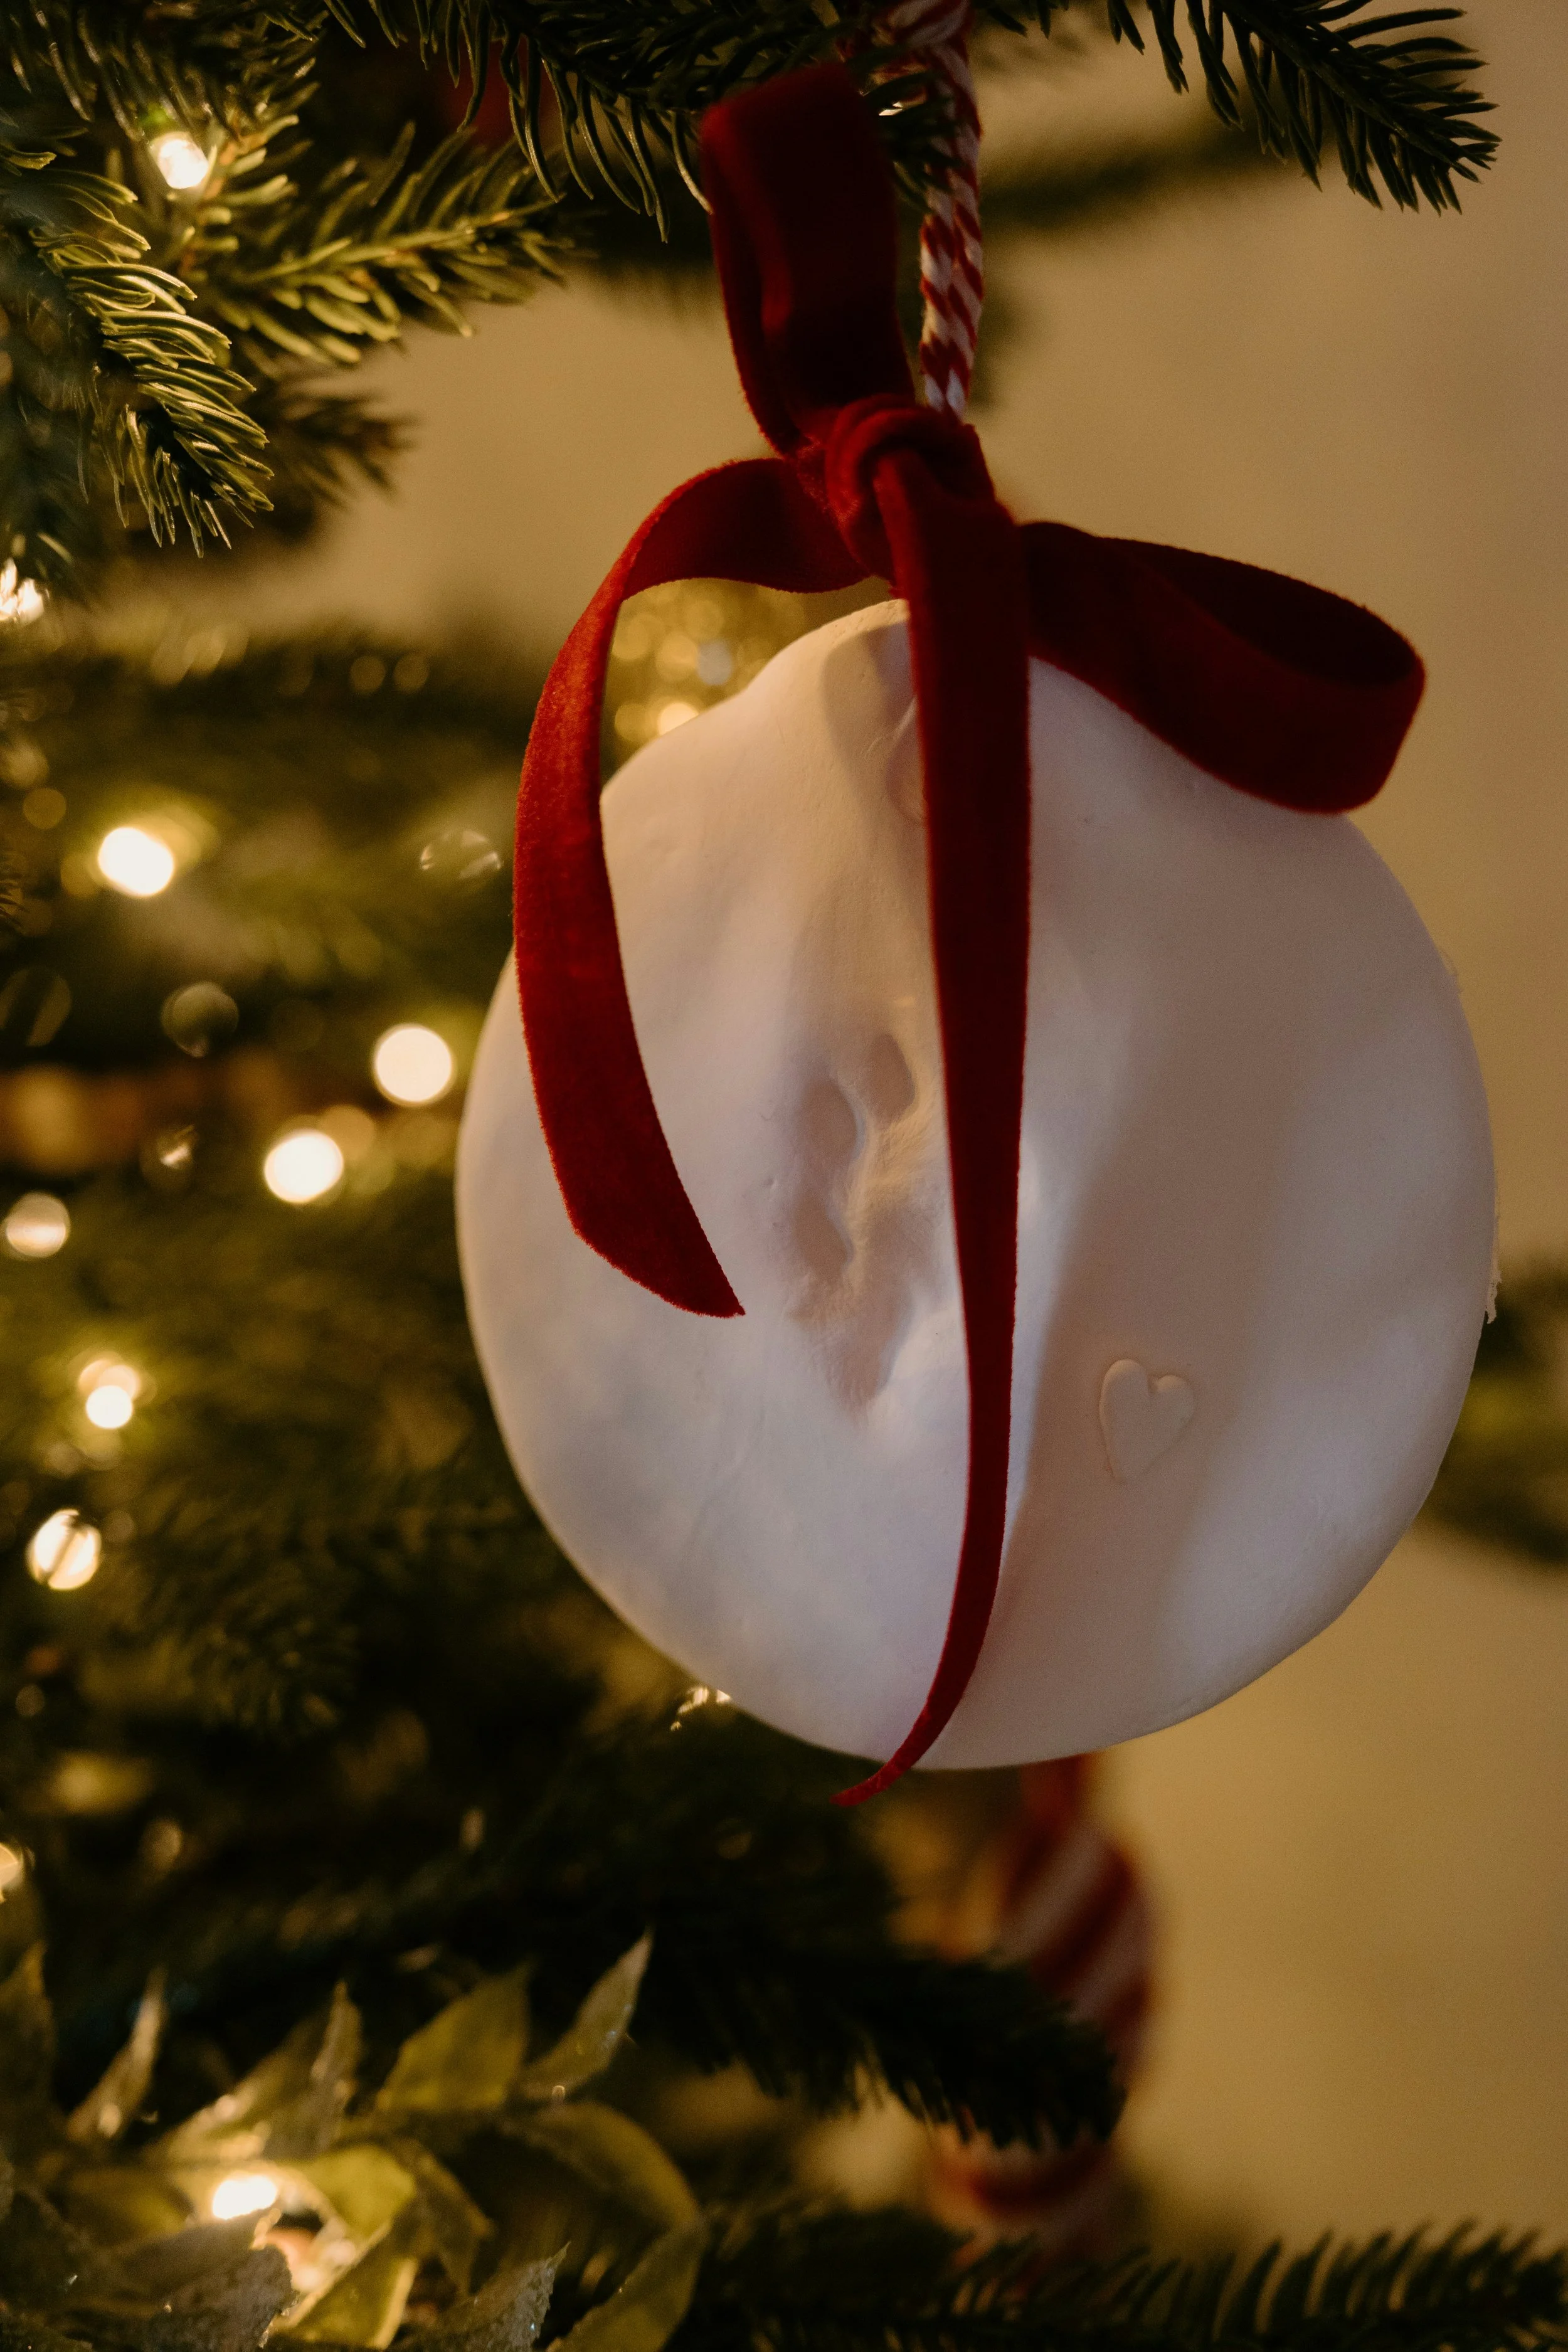
Photo by Emily Irene Photo Co. on Unsplash
Some of the nicest Christmas decorations are the ones that remind us of a particular year.
You could make a simple ornament featuring a family name, initials or the date.
For a family craft session, children could help choose shapes and colours, with an adult handling any tools or steps that need supervision.
A small collection of keepsake decorations could become a lovely tradition over the years.
They don't have to be perfect.
In fact, those little imperfections may be exactly what makes them special.
Tips for Making Air Dry Clay Christmas Decorations
Before starting, there are a few practical things worth remembering.
Keep the Clay Thickness Even
Rolling the clay to an even thickness can help it dry more consistently.
Very thin pieces may be fragile, while thicker pieces can take considerably longer to dry.
Follow the manufacturer's recommendations for your particular clay.
Make Hanging Holes Before Drying
If you're planning to hang your decorations, remember to make the holes while the clay is still workable.
Trying to create holes after drying may cause cracking or breakage.
Allow Plenty of Drying Time
Air dry clay doesn't dry instantly.
Drying times vary depending on the brand, thickness, humidity and room conditions.
Some projects may take several days to dry completely.
Avoid painting or sealing decorations before they're thoroughly dry.
Paint and Seal Carefully
Acrylic paints are often suitable for decorating dry craft clay, but always check the manufacturer's instructions.
Some sealants can help protect decorative finishes, although they don't necessarily make air dry clay waterproof.
Make Small Batches
If you're new to air dry clay, there's no need to attempt all 12 projects at once.
Start with a couple of simple decorations and see how you get on.
You can always make more later.
Can Air Dry Clay Crafts Be Suitable for People With Chronic Illness?
One of the reasons air dry clay appeals to me is the possibility of enjoying a creative hobby without needing specialist pottery equipment.
Living with ME/CFS and fibromyalgia means I have to be careful about how much energy I use, including when I'm doing something enjoyable.
Crafting can still involve physical effort, concentration and repetitive hand movements.
Even something as simple as rolling clay or cutting shapes might be too demanding on a difficult day.
That's why I'd approach these projects in small stages.
One day might involve choosing the designs.
Another could be spent making a couple of simple shapes.
Painting and decorating can wait until the clay has dried and I have enough energy.
There's no need to complete everything in one sitting.
I've written more about adapting creative activities around limited energy in Low Energy Hobbies for Chronic Illness: Gentle Activities for Flare Days.
Of course, air dry clay won't be suitable for everybody. People with hand pain, joint problems or significant fatigue may find the activity uncomfortable or exhausting.
The important thing is choosing something that fits your own abilities and stopping when it becomes too much.
Final Thoughts
There's something special about decorating your home for Christmas with things you've made yourself.
Air dry clay offers plenty of possibilities, from simple stars and snowflakes to personalised keepsakes and festive gift tags.
You don't need to begin with complicated projects or expensive equipment.
A few basic materials, some patience and a little creativity are enough to explore the possibilities.
I'm particularly drawn to the idea of handmade decorations that can be kept and brought out again each Christmas.
And perhaps that's what makes these projects so appealing.
They don't need to look perfect.
They just need to mean something to the people making and enjoying them.
If you're thinking about trying air dry clay this Christmas, starting with a couple of simple decorations could be a lovely way to explore a new hobby.
Frequently Asked Questions About Air Dry Clay Christmas Decorations:
-
You can make Christmas tree ornaments, personalised decorations, gift tags, festive garlands, miniature houses, snowflakes, stars and decorative trinket dishes.
-
Many simple air dry clay projects are suitable for beginners. Flat ornaments made using biscuit cutters are a good starting point because they require relatively few tools or techniques.
-
Drying times vary depending on the brand, thickness and environmental conditions. Some projects may take several days to dry completely. Always follow the manufacturer's instructions.
-
Many craft air dry clays can be painted once completely dry. Acrylic paints are commonly used, but it's important to check the manufacturer's guidance.
-
Sealing may help protect painted finishes, depending on the clay and paint used. However, a sealant doesn't necessarily make the decorations waterproof or suitable for outdoor use.
-
Some simple projects may be suitable for children with appropriate adult supervision. Choose age appropriate materials and tools, and follow the manufacturer's safety guidance.
-
Many craft air dry clays aren't suitable for prolonged exposure to rain or moisture. Unless the manufacturer specifically states otherwise, it's best to keep finished decorations indoors.